
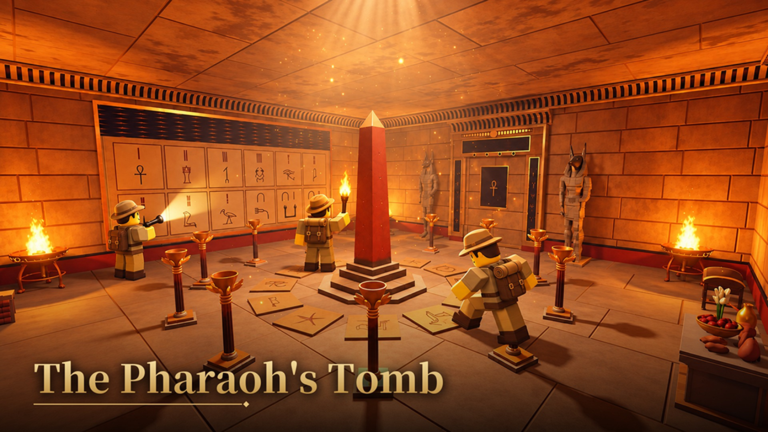
The Pharaoh's Tomb Walkthrough: Solve Every Puzzle and Escape
Full The Pharaoh's Tomb walkthrough for ESCAPE CLUB | Escape Rooms: the torch shadow puzzle, judgment puzzle, corridor of snares, grain puzzle, board game, jars and the final cartouche.
Quick answer
The Pharaoh's Tomb is solved in eight stages: light the room's four corners with the torch, use the bird-side text to solve the torch shadow puzzle and open the anti-chamber, deduce the five gods in the judgment puzzle, cross the corridor of snares on multiples of seven, light the solar boat with the lens and grain puzzle, win the board game, place the canopic figures and pull the tomb open from both sides, then carve and call the name in the final room.
- Most puzzles are randomized per player, so you must read your own room and derive your own answer — the walkthrough teaches the method, not a fixed code.
- Per the walkthrough's narrator, the final room's button sequence is the same for everyone, so you can copy it directly (arrow, N, T, circle with a dot).
- Every stage has a visible success signal — lights turning on, a door opening, or the room clearing — so you always know whether your answer was accepted.
The Pharaoh's Tomb is one of the harder rooms in ESCAPE CLUB | Escape Rooms, mostly because most of its answers are randomized per player. That makes it less a memory test and more a method test: every puzzle gives you a readable rule or a feedback signal, and your job is to apply that rule to your own instance of the room. This walkthrough walks through each stage in order, explains the method, and flags the few places where the answer actually is copyable.
If you get stuck on the basics of moving, interacting or reading objects mid-run, the controls guide covers the inputs you'll use in every room here.
The embedded run is the source this walkthrough is written from: every stage below quotes and verifies the same playthrough, from the torch shadow puzzle to the final cartouche. Most answers are randomized per player, so use the video to see the method, not to copy values.
Stage 1: Light the room and read the bird-side text
Your first task on entering is to take the torch and light all four corners of the room. Lighting the last corner turns on the room's lights, and a readable text appears with the instruction that drives the next puzzle: start from the bird side.
This instruction matters because the symbol sequence in front of you is randomized. Check where the bird symbol sits:
- Bird on the left → follow the symbols left to right.
- Bird on the right → follow the symbols right to left.
Read off your symbols in that direction and note them down in order before touching anything else. In one player's game the sequence read two lines, eight lines, a U shape, then four lines — those are examples of the kind of symbols you'll see, not answers you can reuse.
Stage 2: The torch shadow puzzle (opens the anti-chamber)
The symbols are line counts, and each line count translates to a specific object: two lines is the pillar, eight lines is the snake, a U shape means 10, which is the flower, and four lines is the bug. The puzzle works in two passes:
- First pass — record the shadows. Place the torch into each symbol from your sequence, one at a time. After each placement, note which symbol the torch's shadow falls on. In the recorded run this produced: two lines (pillar) → shadow on the snake; eight lines (snake) → shadow on the pillars; U (flower) → shadow on the bug; four lines (bug) → shadow on the flower.
- Second pass — follow the shadows. Place the torch into the shadowed symbols in the same order you recorded. Each correct placement lights one indicator light, so you can verify your sequence as you go.
When all four placements are correct, the lights come on and the anti-chamber door opens — that's your confirmation that stage one of the tomb is done. The shadow targets differ per player, so do not copy the recorded order above; only the record-your-shadows-then-follow-them method is universal.
Stage 3: The judgment puzzle (five gods)
The anti-chamber leads to the judgment room, where five gods surround you. Your task is to determine who lies and who tells the truth, and the room gives you the key upfront: a feather symbol marks a god who speaks the truth, and a heart symbol marks a liar.
Each god has a statement you can read, and the reliable way through it is deduction from a single assumption:
- Pick one god and assume they are either a liar or a truth-teller, and mark them accordingly.
- Read that god's statement and check it against your assumption — for example, one god's statement in the recorded run said "Anubis and I are opposites," which under a liar assumption actually meant both were the same, cascading into the next god's status.
- Work outward god by god, using each newly determined god's statement to resolve the next, and mark each one as you go.
- If your chain of deductions ever contradicts itself, flip your initial assumption and start the chain again.
In the recorded run, this method concluded that everyone except Osiris was a liar — but the lying/truth arrangement can differ in your game, so treat that as a demonstration of the method, not an answer.
Once every god is marked correctly, pull the lever. That completes the second stage, and afterwards you can collect the lens — hold onto it, it's required two stages later.
Stage 4: The corridor of snares
Directly after the judgment room is a trap corridor with a readable text that says step by seven. That's the entire rule: jump only on the multiples of seven — 7, 14, 21, 28, 35 and 42 — and ignore every other square, counting your jumps as you go.
Stage 5: Light the solar boat (lens and grain puzzle)
At the solar boat, first place the lens you collected after the judgment puzzle, then tackle the grain (eye) puzzle. The room provides a hint: start from the biggest part.
The grain portions are fractions of the eye, and the lever is your feedback mechanism. The method that reliably works:
- Start with the biggest fraction. Pull the lever — it tells you too much or too little.
- If it says too much, remove that fraction and try the next-biggest one. If it says too little, add the next-biggest fraction on top.
- Keep going from biggest to smallest, pulling the lever after each addition, and adjust the set of fractions each time until a pull confirms the combination is correct.
In the recorded run, the working combination was 1×4 plus 1×8 plus 1×16 plus 1×64 — but the correct combination may vary in your game. The biggest-to-smallest order with lever feedback is what makes the search fast, because every pull eliminates a chunk of possibilities. When the pull finally accepts the combination, the sun lights the boat — and the board game waiting in the same area is next.
Stage 6: The Senet-style board game
Next is a board game with its rules posted on a plate in the room. Read them before moving: moves are made by throw counts, and one rule requires you to stop on a specific symbol square rather than passing it — overshooting the symbol square makes the move invalid.
The goal is moving the yellow piece to the end of the board. Moves are made by throw counts, and in the recorded run the player retried a throw when the count didn't work — so plan around the stop-on-symbol rule and retry a throw whenever the count doesn't land you where the rules require. The recorded player solved it by trial and error while obeying the rules, and that is a perfectly workable approach — just never violate the stop-on-symbol rule in the process.
Stage 7: Canopic jar placement and the two-sided pull
The jar room has two quick parts:
- Place the figures. Examine the board in the room, which instructs: the falcon goes at the sunset picture, Jal goes at sunrise, and the baboon head goes on the star. Placing all three solves the jar puzzle.
- Pull the tomb open from two sides. The two pulls must be done quickly — pulling one side, then strolling to the other, fails. Do both pulls promptly in succession. The recorded narrator failed this exact step on the first attempt purely by going too slowly, so treat speed as part of the puzzle, not a detail.
Stage 8: The final puzzle — carve and call the name (per the narrator, same for everyone)
The last room is the trickiest, and per the walkthrough's narrator, this final puzzle is the same for every player, so you can copy the sequence below directly.
Collect the note and the plate. The note says the name is Sent Brah, and carving it follows two rules:
- A god's name moves to the front. Because "Rah" is a god's name, it comes first, turning the name into Ra-Sent.
- Vowels are not written. Removing the vowels leaves Ra-S-N-T as the carving.
Using the plate's symbol key, carve, in order:
| Order | Part | Symbol |
|---|---|---|
| 1 | Ra | Circle |
| 2 | S | S symbol |
| 3 | N | Wave symbol |
| 4 | T | Half circle |
After the carving is accepted, read the note instructing you to call the name. Calling reverses the god's-name rule: when spoken, the god's name goes to the end, and vowels are still removed, giving S-N-T-Rah. Press the buttons in exactly that order:
- Arrow (S)
- N (wave)
- T (half circle)
- Circle with a dot (Ra)
That final press solves the room and completes The Pharaoh's Tomb.
The pattern to remember
Almost every puzzle in this tomb follows the same shape: the room hands you a rule (start from the bird side, step by seven, start from the biggest part, god's name to the front, vowels unwritten), and the randomized part is only the data you apply that rule to. If you read every text and plate before acting and use the feedback signals — indicator lights, lever responses, throw counts — you can derive your own answers even though yours will differ from anyone else's run. For more on how the game's puzzle types work across rooms, see the puzzle mechanics guide, and if you're choosing your next case after this one, the list of all cases and rooms has the full overview.
Related Guides
Puzzle Mechanics Guide
Every lock type in the game and how to read the clues in your own room instead of copying answers.
All Cases and Rooms, and How to Pick Yours
Compare every story case currently playable, with difficulty and theme notes to help you choose.
How to Get a Better Grade
What the escape grade measures and the habits that reliably push your rating up.