
ESCAPE CLUB | Escape Rooms Puzzle Mechanics Guide: Every Lock Type and How to Read Your Own Clues
The puzzle and lock types in ESCAPE CLUB | Escape Rooms — safe dials, keypads, UV ink, Morse code, cipher wheels — plus a repeatable method for reading your own clues and working out each randomized code.
Quick answer
ESCAPE CLUB | Escape Rooms builds every case from a fixed toolkit of real escape-room puzzle types: keys, locks, safe dials, keypads, UV ink, Morse code, lasers and wiring. The puzzle types stay the same, but many passwords and codes are randomly generated for your run, so the real skill is reading your own clues: find the note, book, calendar, board or painting that explains a lock's rule, apply it to the object it names, and enter the code you worked out yourself.
- Press E to examine objects and collect clues, and H to call a hint whenever you are stuck.
- Example answers from guides, like 16-24-19, BASIL or MOON, come from other players' runs and will not match your room.
- Nearly every lock follows the same loop: read the rule in a note, check the object it points to, then enter your own result.
ESCAPE CLUB | Escape Rooms drops you into themed cases — a 1931 detective's office, a failing space station, a haunted hospital ward — and every one of them runs on the same exchange: the room gives you readable clues, the locks demand codes, and the timer keeps score. Because the answers are randomized per player, a walkthrough's finished table of codes is a demonstration of method, not a key you can copy. This guide covers both halves of that deal: the lock and puzzle types you will meet, and the reading habit that solves them in your own run.
The lock and puzzle types you will meet
The official game description advertises “real escape-room puzzles” and names them: keys, locks, safe dials, keypads, UV ink, Morse code, lasers and wiring. The released cases show most of that toolkit in action, plus a family of observation and logic puzzles in Pharaoh's Tomb that are solved by reading instructions written into the room itself. The table below is the quick lookup version — what each lock type with a documented example asks for, and where its answer has been observed to hide. Lasers and wiring are part of the advertised set but have no documented worked example in this guide; the worked examples here come from The Missing Detective, Station Omega and Pharaoh's Tomb.
Data table
- Lock or puzzle
- Directional lock
- What it asks for
- Directions pressed in order on a cabinet lock
- Where your answer comes from
- The purple route the UV light reveals on the wall map (Down, Right, Down, Right, Down in one run)
- Lock or puzzle
- Safe dial
- What it asks for
- Three numbers, set one at a time in order
- Where your answer comes from
- Three marked dates on the room's calendar (16, 24, 19 in one run)
- Lock or puzzle
- Letter lock with Cipher Wheel
- What it asks for
- A decoded word, dialed on the wheel or typed
- Where your answer comes from
- The scrambled word in a note plus the shift hint engraved with the wheel (A = F turned VZJJS into QUEEN in one run)
- Lock or puzzle
- Keypad
- What it asks for
- A numeric code or a color-to-shape sequence
- Where your answer comes from
- A nearby note paired with the object it names — a birthday in a painting, the number on a labeled crate, color-to-shape clues
- Lock or puzzle
- Morse code password
- What it asks for
- Four letters translated from dots and dashes
- Where your answer comes from
- The Morse display in the room, decoded with the in-room reference poster (MOON in one run)
- Lock or puzzle
- Numeric lock on the final gate
- What it asks for
- The exit code
- Where your answer comes from
- The last clue in the room's chain — the briefcase opened by the letter lock in The Missing Detective
Controls you need for reading clues
Reading a room is an interaction loop, and the whole game runs on a small key set:
Data table
- Input
- E
- What it does
- Interact: examine objects, pick up items and collect clues
- Input
- Keys 1 through 8
- What it does
- Switch between item slots to equip whatever you have picked up — a key, a record, the UV flashlight
- Input
- TAB
- What it does
- Open the in-game menu
- Input
- Hold ALT + move the mouse
- What it does
- Make fine angle adjustments
- Input
- H
- What it does
- Call up a hint whenever you are stuck
The controls guide covers the full setup if you are new to the game.
How each puzzle family works
Keys and hidden items
Several cases open with a search rather than a code. In The Missing Detective, interacting with the coat near the door produces a Brass Key that opens the desk drawer — and the drawer holds the UV Flashlight plus a hint note reading “I wrote the way in invisible ink... Shine it on the map. - R. B.” That note is the game teaching you its own puzzle: items you find are rarely the end, they are the tool for the next clue. Picked-up items land in your 1–8 slots, so equip the tool when you need to use it.
UV ink: hidden writing
UV ink is hidden writing that only appears when you use the correct special item on it — and that item has to be found in the room first. The classic sequence is in The Missing Detective: shine the UV flashlight on the wall map and a purple route appears; record each direction the line takes (Down, Right, Down, Right, Down in one run); then press those directions in order into the cabinet's directional lock, which conveniently labels itself “FOLLOW THE MAP” under the same UV light. The purple line is randomly generated, so trace your own map rather than anyone else's list. The dedicated UV map puzzle guide walks through it step by step.
Safe dials
The Safe Dial UI tells you exactly what it wants: “Turn the dial to each number and [Set]. 3 numbers in order.” The answer lives somewhere readable in the room. In The Missing Detective, the November 1931 calendar between the windows carries three marked dates — 16, 24 and 19 in one run — and those, in order, are the combination, confirmed with Set between each number. The marked dates differ every run, so read your own calendar before dialing. If your safe refuses your numbers, the safe code guide shows the full clue hunt.
Cipher wheels and letter locks
Cipher puzzles hand you two things: an encrypted word and a shift hint. The hint is engraved or noted with the wheel — “A = F” on the back in one run, “A = D” in another, which means moving letters three steps backward to decode. Turn the wheel to the matching offset, decode the word, then enter it into the Letter Lock, which allows either approach: “Turn with arrow keys or the wheel, then [Open] - or just type the letters.” One recorded run received the code V Z J J S with A = F engraved on the wheel; five steps of offset turned VZJJS into QUEEN. Both the word and the shift change per run, so set the wheel to your own hint, not a guide's. The cipher wheel guide has the complete method.
Keypads fed by notes and objects
Many keypad codes are never written down as numbers anywhere. Instead, a note states a rule and a nearby object holds the value. Station Omega runs this pattern hard: a book explains that the freezer password comes from the crew members on duty on the current mission day; a note says the locker code is based on a daughter's birthday, which you find in a nearby painting; a note says a password is simply the name of a plant standing in the room; a note directs you to the crate with the Biohazard label, whose written number is the code; and a color-shape puzzle gives color-to-shape clues to enter into a keypad (Red = Square, Blue = Circle, Yellow = Triangle, Green = the remaining shape in one run). Every one of those results is randomized per player, which is why the note-plus-object pairing matters more than any memorized answer.
Morse code passwords
Station Omega hides a four-letter password in Morse code displayed in the room. Translate the dots and dashes into letters — the room provides a Morse code reference poster, and an online Morse translator works just as well. The launch password was MOON in one recorded run, and it is randomized per player, so decode your own signal. The Morse code password guide breaks down the translation.
Observation and logic puzzles
Pharaoh's Tomb shifts the emphasis from codes to reading instructions and acting on them, and it shows how far the same skill stretches:
- A wall text says “start from the bird side,” which sets the symbol order — left to right or right to left depending on where the bird symbol sits. Placing torches on the symbol slots casts shadows that reveal the answer symbols.
- A judgment puzzle asks you to mark five gods as lying or truthful — feather up for truth, heart for liar, per one walkthrough's reading — then pull the lever.
- A corridor text says “step by seven,” so you jump only on the multiples of 7.
- A grain-measuring puzzle answers each lever pull with “too much” or “too little”; one walkthrough solves it by testing the parts biggest to smallest.
- A board game must be played by its posted rules, stopping on the required symbols.
- An object-placement puzzle follows a board that maps each figure to a sunset, sunrise or star picture.
The specific symbols and answers differ per player, but the solving method — read the instruction in the room, then act on it — is always the same.
How to read the clues in your own run
Here is the fact that makes this entire guide work: several passwords and codes are randomly generated per player and per run. Station Omega's walkthrough states it outright — the freezer combination, locker password, plant name, specimen code, Dr. Han's ID and the Morse code password can all be different for each player. The Missing Detective and Pharaoh's Tomb guides repeat the same warning: map directions, calendar numbers, cipher shifts and clock times all differ. That randomized design is also the short answer to why puzzle codes change from one player to the next.
So treat every example answer you read anywhere — including the ones in this article — as a demonstration of shape, not a value to enter. The repeatable method looks like this:
Checklist
- Sweep the room with E
Examine everything you can interact with: coats, desks, drawers, books, calendars, paintings, boards, phones. Notes, keys and tools are all collected this way.
- Find the note that states the rule
Many locks come with an explanation nearby: the password is a plant's name, the locker code is a birthday, the crate code is written on the Biohazard crate.
- Check the object the note points to
Read the painting for the birthday, the book for the mission-day duty crews, the plant for its name, the crate for its number.
- Build the code yourself
Apply the rule to what you found: translate your Morse display, trace your purple line's directions, turn your wheel to its engraved offset.
- Enter your result, not a guide's example
If your code differs from a walkthrough's answer, your room is correct. The method is shared; the values are personal.
- Stuck? Press H
Hints are available anytime, solo or in a party.
Notice the shape of the pattern: the game rarely asks you to guess. A note states the rule; an object holds the value. When a lock has you stuck, you are usually missing one of those two halves, so hunt for the note you have not read or the object you have not examined yet.
Clue chains: one solve feeds the next
Rooms chain their clues. Solving one lock typically yields the item or the reveal that feeds the next puzzle, and The Missing Detective — observed across two independent walkthroughs — shows a full chain: a hidden key opens the drawer holding the UV flashlight and the hint note; playing a found record on the gramophone slides the fireplace painting aside to reveal a safe; the safe holds the Cipher Wheel and a journal whose case years set the bookshelf order that opens a secret room; the phone number on a found business card, dialed on the rotary phone, gives culprit traits to match against the suspect files; solving the suspect puzzle yields the mantel-clock time; and the briefcase revealed by the letter lock holds the final iron-gate code.
Each room's chain differs, but the structure — every solve unlocking the next clue — is typical of the game's room design. Practically, that means an answerless lock is usually pointing at a container or interaction you have not solved yet, not at a clue you have overlooked in plain sight.
Timers, hints and the ESCAPED screen
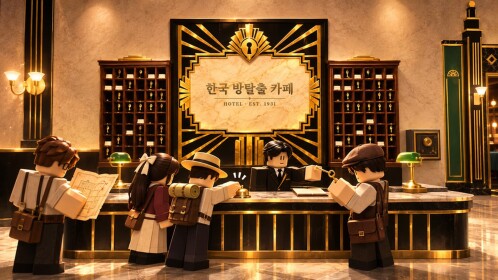
Rooms are themed cases with fixed time limits: CASE 01 The Missing Detective (Mystery, 25 minutes), CASE 02 Station Omega (Sci-Fi, 25 minutes) and CASE 03 Ward 404 (Horror, 30 minutes). You form a party in the hotel lobby — 1 to 6 players, with solo explicitly supported — ride the elevator, and get locked in. A “Time left” timer counts down from the case limit; in one recorded run it opened at 24:45 on a 25-minute case. Choosing a case is covered in the room selection guide, and party setup in the play with friends guide.
Hints are available anytime — H calls one up whenever you are stuck — and the hints guide explains the system in detail. Clearing a room brings up the ESCAPED screen: the room marked cleared, a grade (the official description notes that faster escapes earn better grades), your remaining time, hints used, and Tokens awarded — one cleared Missing Detective run paid Tokens +120. Tokens feed the trails and titles the game advertises, so the same reading skills that crack the locks also push your rewards; the grade guide and tokens guide cover both sides.
More ESCAPE CLUB guides
- ESCAPE CLUB beginner guide — the full first-hour picture
- All cases and rooms — every case in one list
- The Missing Detective walkthrough — plus its culprit solution
- Station Omega walkthrough — plus fuse locations and specimen locations
- The Pharaoh's Tomb walkthrough and the Ward 404 walkthrough
Related Guides
Why Puzzle Codes Change
Why copied codes fail in this game and how to derive the correct values inside your own run.
How to Use Hints
What the hint key does and when pressing H for a hint makes sense.
All Cases and Rooms, and How to Pick Yours
Compare every story case currently playable, with difficulty and theme notes to help you choose.