
ESCAPE CLUB | Escape Rooms: The Missing Detective Walkthrough (Case 01)
A complete Case 01 walkthrough for ESCAPE CLUB | Escape Rooms: every puzzle from the locked 1931 office to the iron-gate escape, and how to derive each run's randomized codes and accuse the right suspect.
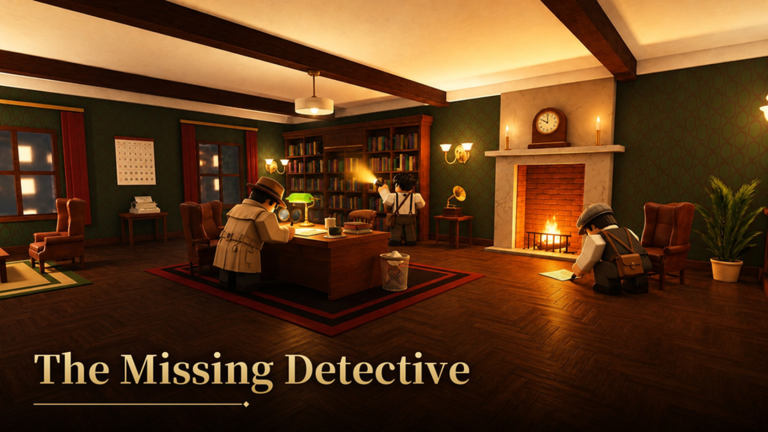
Case 01 · The Missing Detective is the Mystery case in ESCAPE CLUB | Escape Rooms: set in 1931 and rated 25 minutes, it locks you inside a famous detective's office and asks you to expose the culprit before the timer runs out. This walkthrough covers the full route from that locked door to the escape — and because some codes and answers in the case are randomly generated for your run, each step below explains how to derive the answer from the clues in your own game rather than copy another player's numbers.
Quick answer
Case 01 is one linear route: brass key and UV light → purple map directions into the directional lock → gramophone record reveals the safe → calendar numbers open it → journal years order the bookshelf pulls → phone call gives three culprit clues → accuse the matching suspect → set the mantel clock to the crime time → decode the briefcase word with the Season Cipher Wheel → enter the final code at the iron gate and escape.
- Some codes and answers are randomized per run — solve each lock from the clues inside your own game, never a copied code.
- Controls: E to interact, 1-8 for items, TAB for the menu, ALT for the mouse, and H for a hint at any time.
- Play solo or in a party of up to six; faster escapes earn a better grade, and clearing the case pays Tokens for trails and titles.
Roadmap
- 1
1. Unlock the desk
Brass Key, UV light and the invisible-ink note
- 2
2. Read the map
Reveal your run's purple route
- 3
3. Open the directional-lock cabinet
Collect the record and the suspect files
- 4
4. Play the record
Reveal the hidden safe
- 5
5. Crack the calendar safe
Season Cipher Wheel and R. Black's Journal
- 6
6. Order the bookshelf
Open the secret passage
- 7
7. Make the phone call
Three culprit clues
- 8
8. Accuse the culprit
Solve the investigation
- 9
9. Set the mantel clock
Open the next escape route
- 10
10. Decode and escape
Open the briefcase and the iron gate
The embedded run shows the whole route start to finish, including the frame-verified examples quoted below (the calendar safe, the bookshelf order, the accusation and the cleared screen). Your own codes will differ — each step explains how to derive them in your game.
The setup: locked in a 1931 office
Your run opens on the case intro; in one recorded game it names the missing detective as Raymond Black, vanished while investigating the 'Red Diamond' case. The office door locks behind you and a 25-minute 'Time left' timer starts counting down (it began at 24:45 in that run). Everything from here to the escape happens inside the office and the hidden spaces behind it.
Case 01 is playable solo or in a party of up to six — the party guide covers setting one up. The controls you will use constantly: E interacts, keys 1-8 switch items, TAB opens the menu, ALT frees the mouse, and H asks for a hint — hints are available at any time, so a stuck lock never has to cost you the run. If you are new to the experience, the beginner guide and the controls guide cover the lobby and the basics in more detail.
Step 1: Find the brass key and the UV light
The investigation starts with searching the room for a hidden code that yields a key. In the recorded run, interacting with the coat near the door produced the Brass Key, with the message 'The brass key turns with a click.' Use the key on the desk drawer: inside are a UV light (flashlight) and a note from the detective that reads 'I wrote the way in invisible ink... Shine it on the map. - R. B.' That note is the instruction for the whole next stage.
Step 2: Read the purple route on the map
Shine the UV light on the wall map and a purple line appears. That line is a route across the map, and the directions it traces — in the order the line travels — are the combination for the next lock.
Find the cabinet with the directional lock: under the UV light it is marked 'FOLLOW THE MAP'. Enter your directions in exactly the order your purple line takes them and the cabinet opens. One text run's line read Down, Right, Down, Right, Down, but the purple line is randomly generated every run, so record your own sequence instead of copying an example. The UV map puzzle guide takes a closer look at this puzzle.
Step 3: Play the record on the gramophone
The cabinet contains a record and a set of suspect information. Take both — the suspect files decide the accusation later. Place the record on the gramophone and play it to hear a message from the missing detective. In the verified run, playing the record makes the painting by the fireplace move aside, revealing a hidden safe.
Step 4: Open the safe with the calendar numbers
The safe behind the painting needs a three-number combination entered in order, and the calendar in the office supplies it. Look for the red-highlighted numbers on the calendar — in the verified run, the November 1931 calendar between the windows showed three circled dates, each tagged with its position in the sequence (circled 1, circled 2, circled 3).
The Safe Dial UI spells out the input format: 'Turn the dial to each number and [Set]. 3 numbers in order.' Turn to your first number, press [Set], then repeat for the second and third. One text run used 19, 5 and 21 — entered as 19521 — while the verified run dialed 16, 24, 19. The highlighted numbers are generated per run, so read your own calendar before touching the dial. The safe code guide covers this puzzle in more depth.
Step 5: Pull the bookshelf books oldest to newest
Opening the safe rewards you with the Season Cipher Wheel — keep it, it decodes the case's final puzzle — and a book, R. Black's Journal, which lists past cases together with the year of each.
The bookshelf wants the four cases pulled from oldest to newest. Read the years in your journal, work out the chronological order, then pull the four matching books on the shelf in that sequence. Pull all four correctly and a secret passage opens.
The documented runs pulled the four cases in different orders, so read the years in your own journal instead of copying an example order. One text run's journal led to the order Red Fox, Black Cat, Blue Rose, Golden Mask (oldest to newest), while the verified run's journal listed Blue Rose 1930, Golden Mask 1929, Red Fox 1927 and Black Cat 1915 — making Black Cat the oldest pull in that run and Blue Rose the newest. A journal can also mention undated, unsolved cases (the verified run added 'The Silver Wolf and White Raven cases remain unsolved'); the pull order uses the four dated cases.
Step 6: Find the phone number and take the call
Search the newly unlocked area carefully: you need a phone number and the phone. The number is randomized — one text run used 21631, and the verified run found its number, 38493, on a crumpled business card in the wastebasket, made out for the manager of the Rose Club.
Enter your number on the phone and make the call. The call delivers three clues about the culprit; one text example received the culprit is left-handed, the culprit smokes, and the culprit was not at the Opera House at 9:00 PM. Write all three down before moving on — they are the entire basis of the next step.
Step 7: Eliminate suspects and accuse the culprit
Now open the suspect files from the directional-lock cabinet. There are four suspects, and each file lists the details your clues test: handedness, whether they smoke, and where they were at 9:00 PM. Compare each suspect against each clue and eliminate anyone a clue contradicts — the one suspect who survives all three is the culprit. Go to the suspect selection area and vote for them; in the verified run the accusation is made on the evidence board.
A worked example from that run: the clues were left-handed, smokes, and not at the Opera House at 9 PM. Sir Edward does not smoke at all — out. Rose Marie was on the Royal Opera House balcony at 9 PM — out. Morris the Butler is left-handed, smokes cigars, and was near Warehouse 7 at the docks at 9 PM — he matches all three and was the run's correct accusation. Its four files were Sir Edward, Rose Marie, Morris the Butler and Captain Jack Harper, but both the details and the culprit change between games; the text example run ended by accusing Sir Edward instead. The culprit guide walks through this deduction in more detail.
Step 8: Set the mantel clock to the crime time
A correct accusation earns you the time of the crime. The mantel clock above the fireplace is the next lock: interact with it for Hr-, Hr+, Min- and Min+ controls plus a 'Set time' button, under the prompt 'Turn the hands to set the time'. Set the hour and minutes to the time you received and press Set time — the correct time opens another escape route, which in the verified run was the passage behind the fireplace.
The time is randomized: the verified run set 9:30 and a text example used 11:35, so always enter the time your own run gave you.
Step 9: Decode the briefcase with the Season Cipher Wheel
Beyond the clock route waits a locked briefcase with a Letter Lock, and beside it a coded word — the verified run's red note read 'V Z J J S', signed '- J.'. This is what the Season Cipher Wheel from the safe was for. The engraving on the wheel gives the shift: 'A = F' means each coded letter moves five positions back through the alphabet, while an 'A = D' engraving means three back.
Apply the shift letter by letter. In the verified run, V Z J J S decoded to QUEEN. Enter the decoded word into the Letter Lock — turn it with the arrow keys or the wheel, or simply type the letters — and press [Open]. The cipher wheel guide shows this process step by step.
Step 10: Enter the final code and escape
Inside the briefcase is the last piece: the final numeric code for the iron-gate lock; one run's was 8245. Enter your code into the iron gate's lock and the gate opens. The EXIT door prompts '[E] Escape!' — press E to finish, and the run closes on 'The Missing Detective · Cleared' with a grade, your escape time and a Tokens reward. For reference, the verified solo run escaped in 07:52 with an S grade, 120 Tokens and no hints used.
Capture your own answers: what is randomized
If you remember one thing from this guide, make it this: Case 01 generates fresh answers every run. The UV map directions, calendar safe combination, bookshelf case order, phone number, suspect details and phone clues, crime time, cipher word and final escape code can all differ from the examples above — the route is fixed, the values are not. Capture your own values as you go:
Checklist
- UV map directions
Trace your purple line under the UV light and note each direction in order.
- Calendar safe numbers
Note the three red-highlighted calendar numbers and the order they are circled in.
- Journal case years
The four dated cases and their oldest-to-newest order can differ between runs.
- Phone number
Copy the number you find in the secret area before you dial.
- Three phone clues
Write down the culprit traits the call delivers.
- Suspect file details
Note handedness, smoking and 9 PM location for all four suspects.
- Time of the crime
Given after a correct accusation; needed for the mantel clock.
- Cipher wheel engraving
The hint on the wheel (for example A = F) sets how many letters to shift back.
- Coded word
The note by the briefcase's Letter Lock.
- Final gate code
The numeric code inside the briefcase for the iron-gate lock.
Why the codes change between runs, and what stays constant, is explained in the puzzle codes guide.
Hints, grades and Tokens
Two support systems shape how a run goes. Hints are available at any time — press H whenever a lock stalls you, or see how to use hints for getting the most out of them. Speed sets your grade: faster escapes earn a better grade on the cleared screen, and clearing the case pays Tokens, the currency behind trails and titles. Both are covered further in the grade guide and the Tokens guide.
With the culprit accused, the clock set and the iron gate open, Case 01 is cleared. The same lock-and-clue format continues in Station Omega and Ward 404, and the all cases overview lists every room currently in the experience.
Related Guides
The Missing Detective Calendar Safe Code
Read the calendar clue correctly and enter the painting safe code from your own evidence.
The Missing Detective UV Map Puzzle
Read the purple UV route on the map and set the directional lock to match your own run.
The Missing Detective: Find the Correct Culprit
Turn the three phone-call clues into a suspect deduction that names the right culprit every run.
The Missing Detective Cipher Wheel
Use the season cipher wheel to decode the briefcase word and open the final lock.